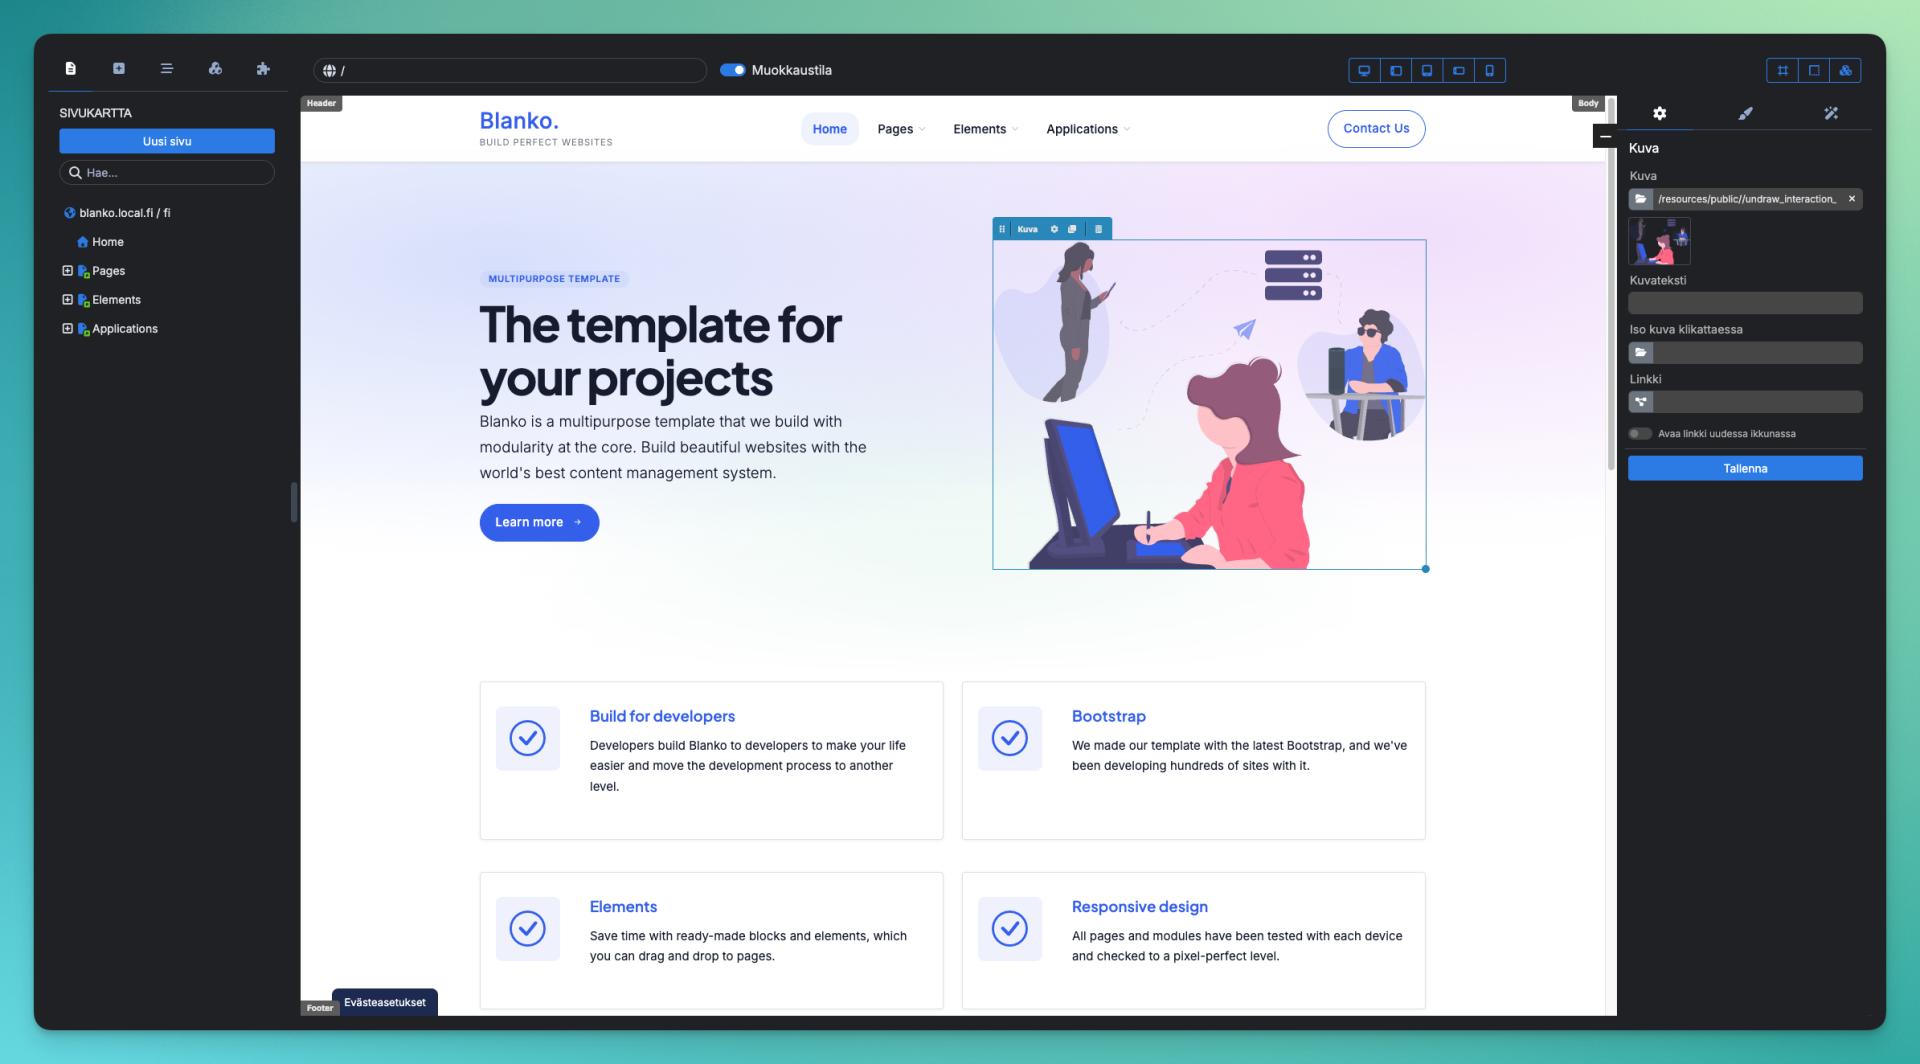
The page editor allows you to edit website content visually and preview changes in real time. The layout is split into the left sidebar, the central preview canvas, the right settings panel, and the top toolbar.
Left Sidebar Use the left menu to manage page structure, add elements, and adjust site-wide styles:
Page Map: View your site tree and create new pages.
Add Content: Drag and drop new content blocks and elements directly onto the page.
Page Structure: Displays a tree view of all sections and blocks on the active page.
Master Content Areas: Manage global header/footer sections that repeat across all pages. You can also pin a selected section to make it global.
Global Styles: Adjust site-wide visual settings, such as global color palettes and typography.
Right Settings Panel The panel on the right side is hidden by default. It opens when you select an element on the page and click its plus icon. It contains three tabs:
Settings: Basic properties specific to the element, such as image sources, link destinations, or text values.
Styles: Visual customization, including background colors, borders, and sizing.
Effects: Entrance animations and display triggers, such as fade-in effects when scrolling.
Top Bar and Auxiliary Tools The top bar shows the current page URL, lets you switch between edit and preview modes, and allows you to test responsive views across desktop, tablet, and mobile screens.
On the right side of the top bar, you can toggle the following editor tools:
Show Alignment Lines: Displays guide lines to help align element borders accurately.
Show Margins: Highlights section spacing and lets you quickly adjust top and bottom margins by dragging.
Edit Master Content: Enables editing for global template sections that appear across all pages. Master content elements are highlighted with green toolbars.